


There are many reasons that you may want to back up your Office 365 data. The most common reasons I see are data sovereignty and compliance laws that require data to be stored in country or customers that want a backup plan for their cloud data. The latter is something that all businesses should consider – while your data is safe in Office 365, you may or may not know:
- Office 365 doesn’t provide point in time backups (although, OneDrive and SharePoint do provide versioning)
- If a user deletes data, by default after 30-days it will not be recoverable
- If Office 365 went down for a considerable period, you would not have access to your data for the duration
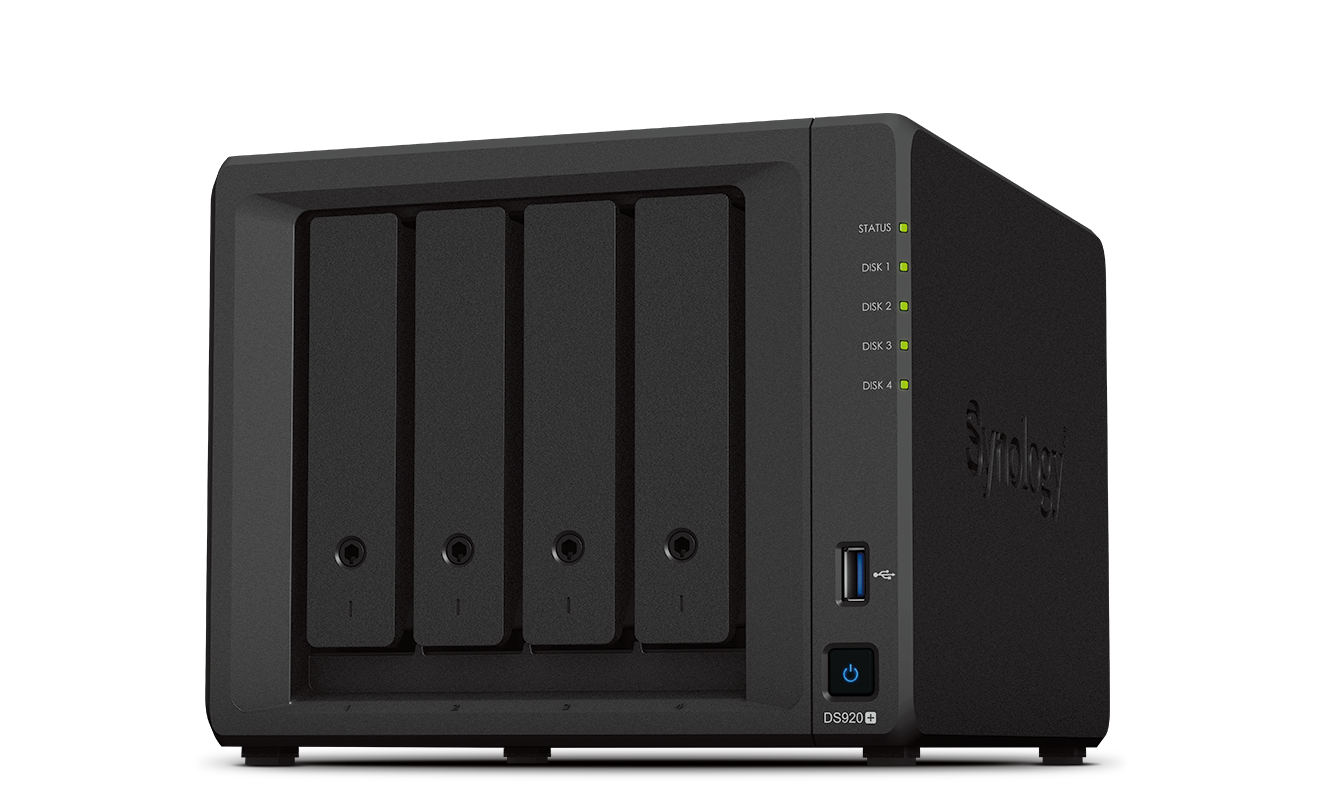
An Office 365 backup solution can help address these points, and one that you physically own can ensure you meet data sovereignty and compliance laws in your region. This is where a Synology NAS can help, and they come in all shapes and sizes to meet your needs. I got my hands-on a Synology DS920+ which is a small form factor 4 bay unit. You can check out which models support Office 365 backup here, but as a rule of a rule of thumb the Plus, xs/xs+, SA, and FS series should support it.
In this guide I will take you through the basics to get your back up configured and take you through the management interface including the process to restore and export. I’ll do so using a mixture of video and written content.
Management Interface
Review of the management interface including the process to restore and export your back up data.
Device & Office 365 Backup Setup
Device Setup Basics
Before you power up the device make sure you have installed at least 1 drive. You cannot complete the initial setup wizard without it.
This guide is demonstrated on the Synology DS920+ running firmware DSM 6.2.3-25426 Update 3.
The Synology NAS can be accessed using the following URL on port 5000:
If that does not work for you, you’ll need to discover its IP address e.g. http://192.168.1.50:5000/
Click ‘Set up’:

Click ‘Install Now’ to install the latest updates:

Give the device a name and create an admin account:

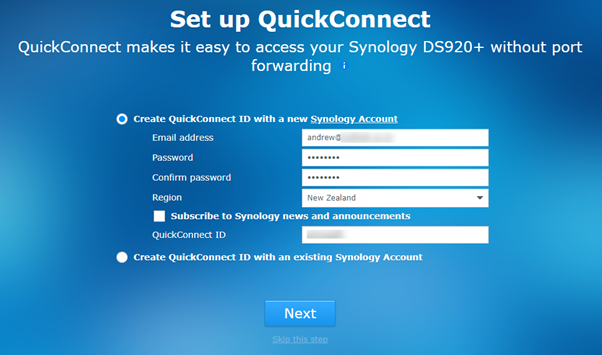
Create a Synology account. Amount other things, this gives you access to your NAS remotely without having to configure your network and is required to use Office 365 backup:
Accept the privacy statement:

You will be given your unique QuickConnect URL which you can use to access your NAS on and off your network e.g. http://QuickConnect.to/<USERNAME>

At this point you are done. Click ‘Go’ to login to your NAS. This should redirect you to the login page. In my case this did not happen, nor did a page refresh work. However, I was able to use my QuickConnect URL to get there.

Login using the admin account you created:

Once you have logged in you will need to setup your disk. Click the Main Menu button at the top left, then select ‘Storge Manager’:

Select ‘Volume’ then ‘Create’:

I only have 1 disk installed so opted for ‘Quick’:

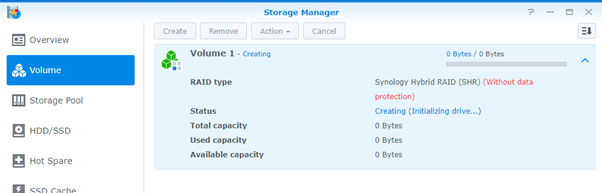
I chose ‘SHR’ for my RAID type:

Select the drives that you want to include:

Confirm that data will be erased:

I chose the ‘Btrfs’ file system:

Confirm your settings and click ‘apply’ to start building your volume:

Once your first volume is created, you can move on to the next steps:
A preparation step required for Office 365 back up is to create a shared folder for your data. You will use this location later in the article. Go to Main Menu and select ‘Control Panel’. Under the ‘File Sharing’ category select ‘Shared Folder’:

Select ‘Create’:

Give the folder a name and description and select the disk/volume:

I chose not to encrypt my data. If you choose to encrypt, keep your key in a VERY safe place!:

I enable ‘checksum’ to validate data integrity:

The default permissions work fine:

Confirm your settings then hit ‘Apply’ to create your shared folder:

Install Active Backup for Microsoft 365 & Configure a Backup Task
Now to the topic of this blog post – backing up your Office 365 data. You’ll need to install a ‘Package’/App to do this. Open ‘Package Centre’ from the desktop:

Search for ‘Active Backup for Microsoft 365’, then select ‘Install’:

Once installed, select ‘Open’:

You will be prompted to run through the activation wizard. Select ‘Activate’:

Accept the privacy statement then select ‘Next’:

You will be asked to login to your Synology account (created during initial setup):

Finally, you should see ‘Package Activated’. Select ‘OK’ to begin configuration of the package:

Select ‘Create a new backup task’:

In the next step you will need to register an application in Azure AD. Thankfully, Synology make this simple by providing a script. Click the ‘this tutorial’ link to download the script and learn more about the steps required. At the time of writing, you can also find that page here. The guide is very good so I won’t go into the details here other than to summarise them:
- Set your PowerShell execution policy ‘Set-ExecutionPolicy -ExecutionPolicy RemoteSigned -Scope Process’
- Download the ps1 script
- Run the script and follow the prompts
- During the process you will need to enter the credentials of an Office 365 Global Administrator
- Once the script has completed you will be provided the Tenant ID, Application ID and the path to a certificate that was created for you. You will need these to complete the backup task setup process
- You will also be provided a URL – follow the URL and login using the same Global Admin account. Select ‘Grant admin consent for <OrganizationName>’ then when prompted, select ‘Yes’

Now we can continue the backup task setup process…
Enter the information created from the previous step:
- Choose your Microsoft 365 endpoint – for most this will be ‘Microsoft 365’, unless your tenant is in Germany or China
- Enter the domain admin used above
- Enter the Tenant ID and Application ID provided by the script
- Click the ‘Upload’ button and navigate to the path where the certificate was created and select and open it
- Enter the certificate password you provided
If you have entered the correct information you should be able to move on to the next step.

If you have not created any shared folders, you will be asked to do so. It’s better to create your shared folders in advanced as mentioned earlier in this article. If you haven’t, the wizard is the same so just follow the above instructions – once the wizard completes, just note that you will need to select ‘Back’ then ‘Next’ to refresh the list of shared folders.
Give your task a name and select the shared folder to set as the backup destination. You can also choose enable user self-service by ticking ‘Enable Active Backup for Microsoft 365 Portal’ – this non-admin users to administer backups.:

Select the services that you want to auto-backup. This ensures that new users, groups and sites that are created are automatically added to the backup job. If you don’t select a service here it will become a manual task:

Choose your backup policy. In my case I am chooseing ‘Continuous backup’ which means that file changes are caught and backed up within a few minutes. You could also run on a simple schedule or run manually.
Also, choose the data retention period.

View the summary and select apply:

From the ‘Task list’ you will see the initial backup job kick off:

What about document libraries. After I went through this, it backed up everything but the libraries.
It can backup SharePoint document libraries. Did you select these in the backup jobs settings?
If I use this tool to back up our Office 365 content (especially documents in SharePoint Online), is there a way to access backed up documents directly from the NAS (ex: via a shared drive mapped in Windows)? I am asking just in case one day we want to leave Microsoft cloud. Being able to restore to SharePoint Online is good but what if I need to access files straight from the NAS via a share? Is that doable? Thank you!
I don’t think that you can directly access the backup files where they are. But you could restore the files to a file share on the NAS and access that copy of the files. Hope that helps.
Say you have a bunch of files in SharePoint that are encrypted in M365 using MS functionality.
I backup those to my Synology.
Scenario:
Internet (or Microsoft) is down for an extended period of time.
Question:
Can I restore and access the encrypted files to a local desktop PC?
Hmmmmm I am not sure how that would turn out. If the documents are encrypted using sensitivity labels for example, access to them requires that you authenticate to M365, so I would say no they would not be accessible. Microsoft provide a way to backup and decrypt via encryption key. Quick search didn’t pull up much, but this is an interesting question.