


Microsoft Teams doesn’t yet support Azure Information Protection or Unified Classifications. Apparently that’s coming at some point in the future. For now, you can create text based classifications – they don’t do anything other than display in the Microsoft Teams client (and Office 365 Groups) – none the less the are still useful to set expectations with your users.
Creating Classifications
Creating classifications requires PowerShell and you’ll need the AzureAD module installed.
Install the AzureAD module:
|
1 |
Install-Module AzureAD |
Connect to Azure AD:
|
1 |
Connect-AzureAD -Credential (Get-Credential) |
Make sure you don’t have any existing classifications defined in “ClassificationList” that you might overwrite:
|
1 |
Get-AzureADDirectorySetting | ForEach Values |
![]()
Add your classifications – in my case below I am adding:
- Classification Names: Internal,External,Confidential,Highly Confidential
- Classification Descriptions: Internal: Internal users only, External: Could contain external users, Confidential: Contains confidential information, Highly Confidential: Contains confidential information
|
1 2 3 4 |
$settings = Get-AzureADDirectorySetting | where-object {$_.displayname -eq "Group.Unified"} $settings["ClassificationList"] = "Internal,External,Confidential,Highly Confidential" $settings["ClassificationDescriptions"] ="Internal: Internal users only, External: Could contain external users, Confidential: Contains condidential information, Highly Confidential: Contains condidential information" Set-AzureADDirectorySetting -Id $settings.Id -DirectorySetting $settings |
|
1 |
Get-AzureADDirectorySetting | ForEach Values |

Now, go grab a coffee and have an extra long conversation with whoever will listen (it can take a while before these new classifications are available)….
Right you’re back. Ok, now you can assign your classifications. Select the “…” menu along side the team you want to add the classification to, and choose “Edit team”:

You should now have a new option. Select “Change Setting” then select the Classification you want to assign from the drop down list:
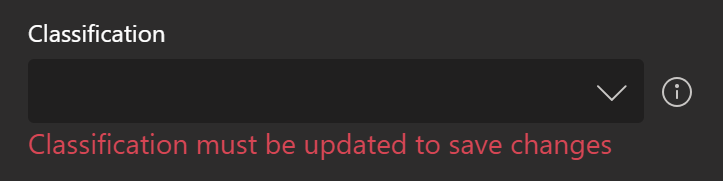
If you added Classification Descriptions you can see these by hovering over the information icon:
Unified Classification Labels
Hopefully we will see Unified Classification Labels soon. That will save you a bunch of time and provide a lot more functionality:
- Enforce protection settings such as encryption or watermarks on labeled content. For example, your users can apply a Confidential label to a document or email, and that label can encrypt the content and apply a Confidential watermark.
- Protect content in Office apps across different platforms and devices. Sensitivity labels work in Office apps on Windows, Mac, iOS, and Android. Support for Office web apps is coming soon.
- Prevent sensitive content from leaving your organization on devices running Windows, by using endpoint protection in Microsoft Intune. After a sensitivity label has been applied to content that resides on a Windows device, endpoint protection can prevent that content from being copied to a third-party app, such as Twitter or Gmail, or being copied to removable storage, such as a USB drive.
- Protect content in third-party apps and services, by using Microsoft Cloud App Security. With Cloud App Security, you can detect, classify, label, and protect content in third-party apps and services, such as SalesForce, Box, or DropBox, even if the third-party app or service does not read or support sensitivity labels.
- Extend sensitivity labels to third-party apps and services. With the Microsoft Information Protection SDK, third-party apps on Windows, Mac, and Linux can read sensitivity labels and apply protection settings. Support for apps on iOS and Android is coming soon.
-
Classify content without using any protection settings. You can also simply assign a classification to content (like a sticker) that persists and roams with the content as it’s used and shared. You can use this classification to generate usage reports and see activity data for your sensitive content. Based on this information, you can always choose at a later time to apply protection settings.
Conclusion
While not as feature rich as Unified Classification Labels, simple text based Classifications still have a place and help coach your users to do that right thing. Hope this helps, and as always, if you have any questions hit me up below.
Is it possible to set classification label on a EDU Class Team? I can not set there the labels.
Kind regards
Oli
I haven’t tried this myself, but I would assume so. Where did you get stuck – creating the labels via PowerShell?
Hi how to overwrite if there is an existing classification? in other words, ex: my classification list is: ClassificationList : Confidential,Restricted,Internal Use,Public
i want to change it to :
ClassificationList : test1, test
how do i do it?
I cant be 100% sure off the top of my head, but looking at the PowerShell, can you not just run the same to overwrite? You could also try blanking them out first:
$settings[“ClassificationList”] = “”
$settings[“ClassificationDescriptions”] = “”
Or:
$settings[“ClassificationList”] = $null
$settings[“ClassificationDescriptions”] = $null
Not in a position to test unfortunately.